


 In just a few easy steps, these fall-inspired, edible necklaces are crafted from candy corn and ribbon, making a perfect gift for the deserving teacher in your life! (More on why our teachers “aren’t okay” and need our support more than ever, here).
Bonus: Even if your teacher hates candy corn, at least they’ll look cute wearing it!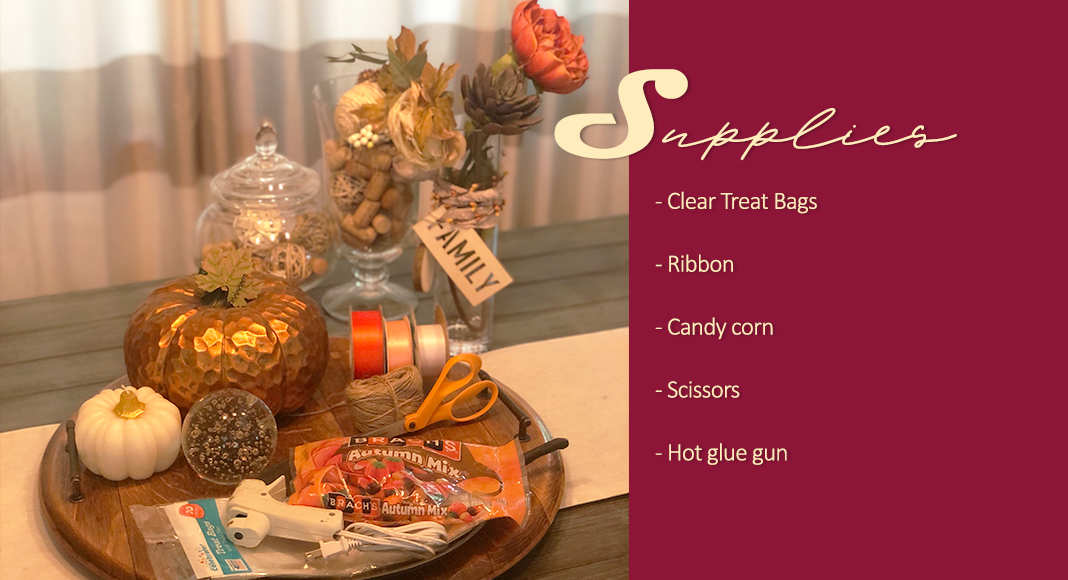
This is my fun Halloween twist on a classic family tradition. I was inspired by my mama, who back in the early ’90s would help me make similar necklaces for my elementary school teachers for Easter (using jelly beans instead of candy corn). So grab the kiddos, and let’s get crafting!

Trick-or-Treat: A DIY Necklace Teachers Can Eat!
Supply List:
- Clear treat bags (5in x 3in x 11in)
- Various fall-themed ribbons, twine, etc.
- Candy corn (I purchased the Autumn Mix variety packs)
- Scissors
- Hot glue gun (optional)
Step-by-Step Instructions:
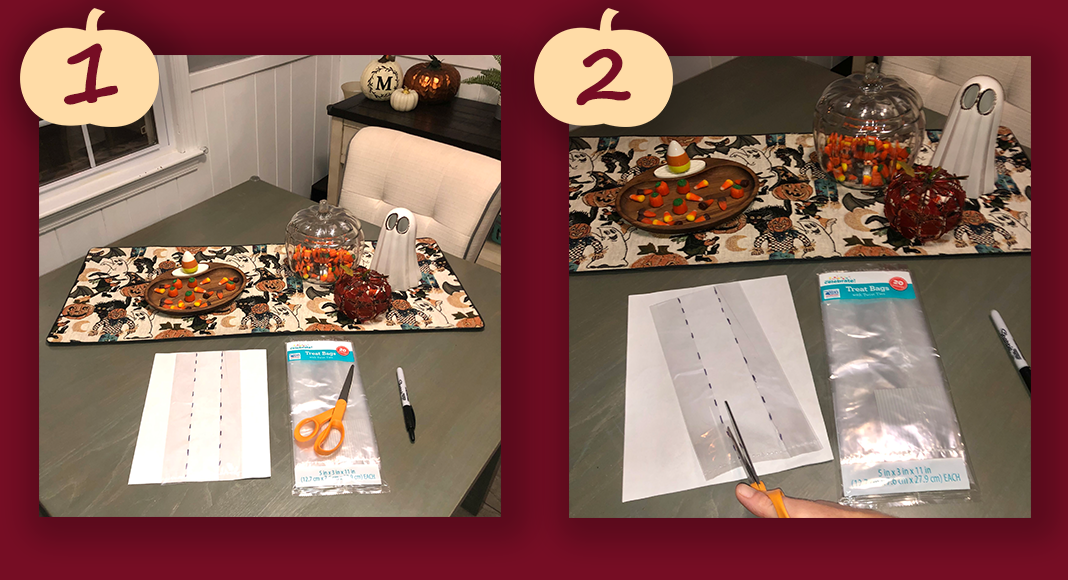 Step One: Using a sharpie, divide one of your clear treat bags into 1/3 segments, lengthwise. (There are natural seams that make it easy to cut without making marks, but for visual purposes, I’ve marked the lines in image 1 so it’s easy to see where to cut.)
Step Two: Cut along the two lines you’ve drawn to create three, lengthwise segments (making sure to keep the bottommost natural seam of the bag intact).
 Step Three: Discard the centermost piece of the bag.
Step Four: This is the trickiest step. Good news, you’ve got an entire pack of clear bags if you mess up. The two outside strips remaining will now be used to create two different necklaces. (Note: You may need to refer to image six before continuing on to step #5, so you can see what you’re trying to achieve before making the next cut). Start by unfolding one of the two side strips. There is a natural centerfold lengthwise, that you will cut down to the bottommost seam, but not through the seam. The goal is to cut down to the seam, leaving the seam intact, to create two “boats” where you’ll eventually start placing your candy corn. (Again, reference image #6 before making your cut. The natural bottom seam will be the center of your necklace, with the two side attached flaps created by your cut, acting as the “boats” that will hold your candies.)
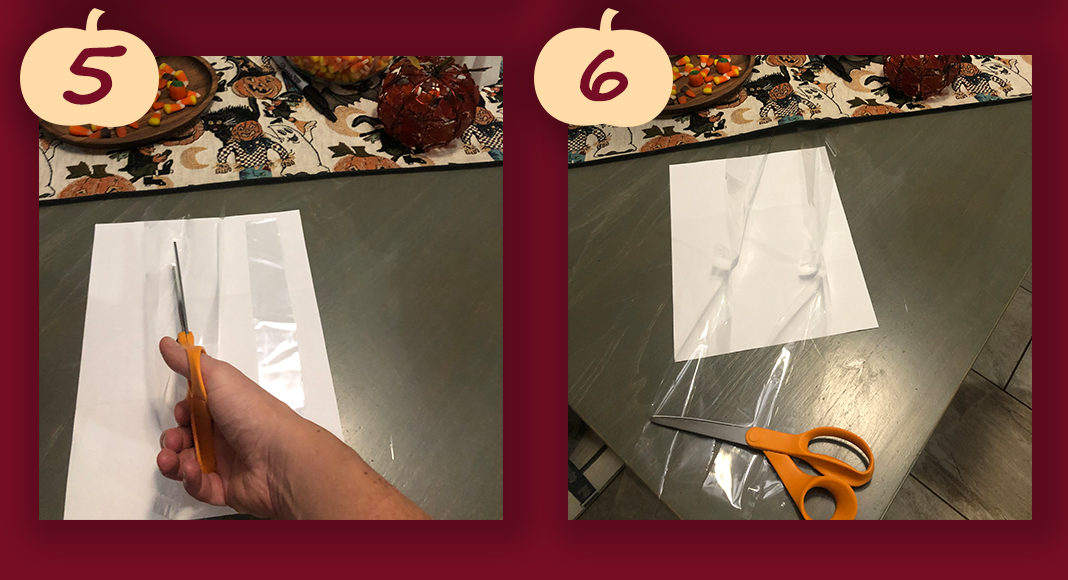 Step Five: Make your centerfold cut down to the seam two create your two “boat” flaps.
Step Six: Cut your second strip the same as the first in step five, and lay them out lengthwise to start loading your candy corn. I found that using my scissors to weigh them down helped hold the sides open so I could start to load the candies.
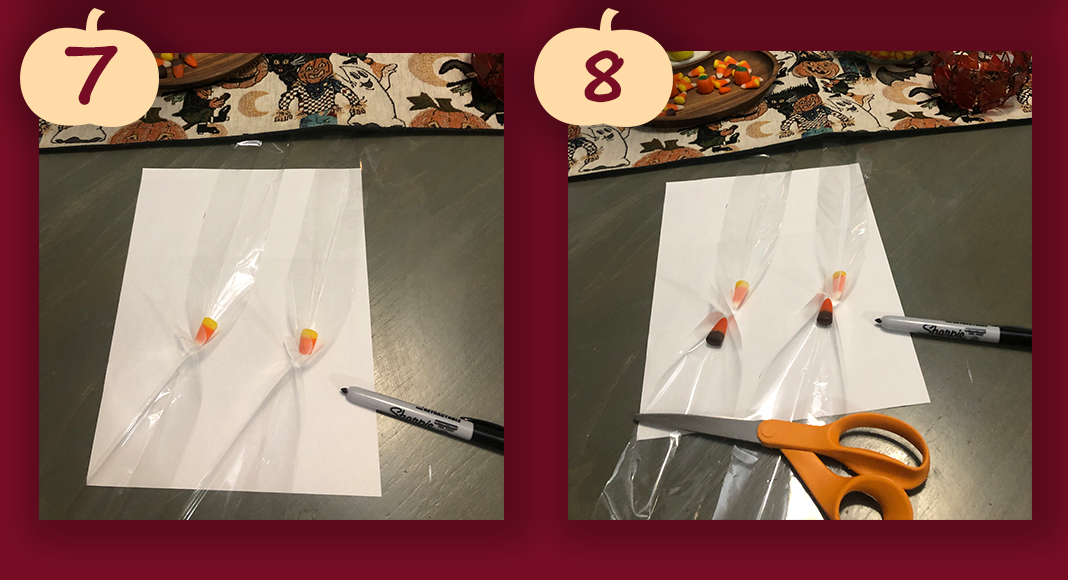 Step Seven: Start placing your candy corn in one of the pockets of both of your necklaces.
Step Eight: Now place another set of candies on the opposite side of your center seam. This will allow you to see the pattern you’re starting to make. You can get creative! Make it your own.
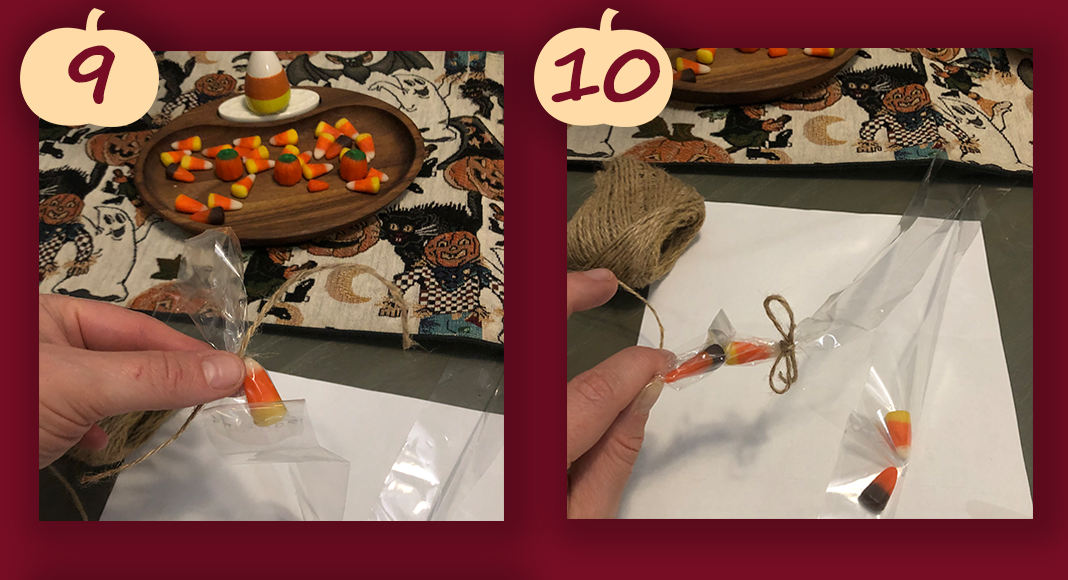 Step Nine: Next you’ll start to secure the candies inside of the clear treat bags using a twist-and-tie method. Just like you’re closing a loaf of bread, pinch your candy corn securely inside the clear bag flap, twist one-to-two times, and secure with burlap, twine, or ribbon, by tying it into a bow.
Step Ten: Repeat step nine on the other side of the center seam with a second piece of candy of your choosing.
 Step Eleven: As mentioned, make it your own! Add another piece of candy corn, opposite colors, or if you purchased a variety pack of candy corn, use a pumpkin. (Note: I found the pumpkins to be a tad large for the width of the plastic, so I had to work with it a bit to be able to twist and secure. This is where a hot glue gun and some spare clear pieces of plastic might come in handy if your eyesight and dexterity is dwindling like mine). (Another note: From this point on visually, I’ll only build the first necklace, and will come back to finish the second necklace later).
Step Twelve: Now you have enough candy in place to see how the necklace will start to come together. Notice I haven’t yet secured the center seam outside of its natural glue. You might consider tying a ribbon or twine between the center two most candies, now that it’s secure, so it looks nice and the seam isn’t showing (pictured below in image 13).

Step Thirteen: Continue to add candy pieces on both sides of your necklace, until you’re left with approximately 1-2 inches of plastic hanging out on both ends from the last two candy pieces you’ve secured.
Step Fourteen: Grad any color ribbon, yarn, twine or burlap to use for the portion of the necklace that will go around the neck. Prior to cutting your ribbon, secure the loose end to one end of your necklace. (I used a square knot to secure the ribbon to this necklace, while I used a traditional bow look for the second necklace I made, pictured below. Don’t forget to be creative and make it your own!) Next, drape the ribbon spool around your neck so you can measure how long you want your necklace to hang prior to making your final cut. Finally, secure the other end of the ribbon to your necklace using a square knot or bow. BRAVO! You’re officially a Halloween Pinterest Goddess amongst Mamas.
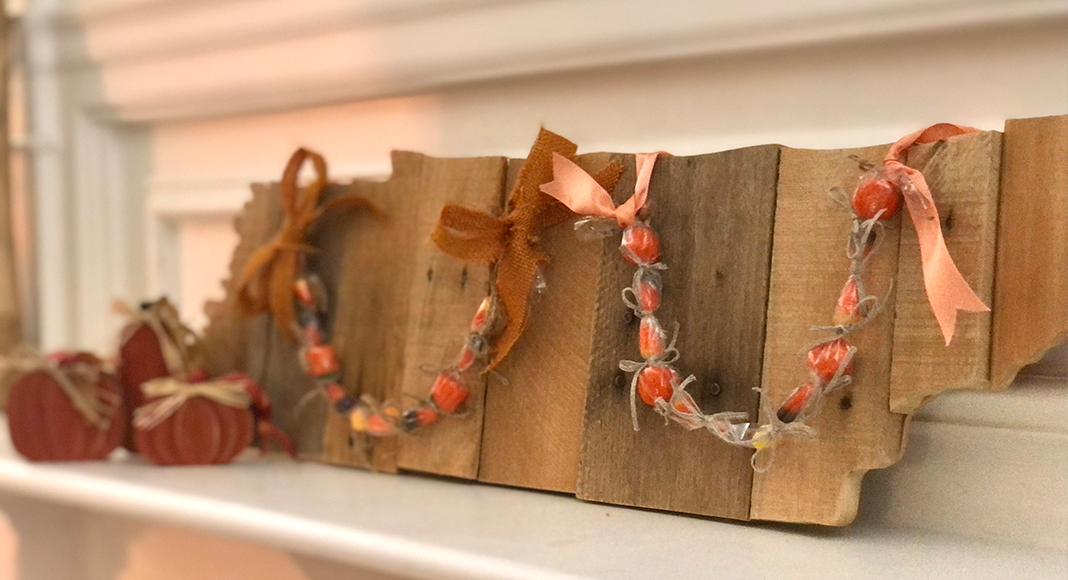
Completed Project Photos:
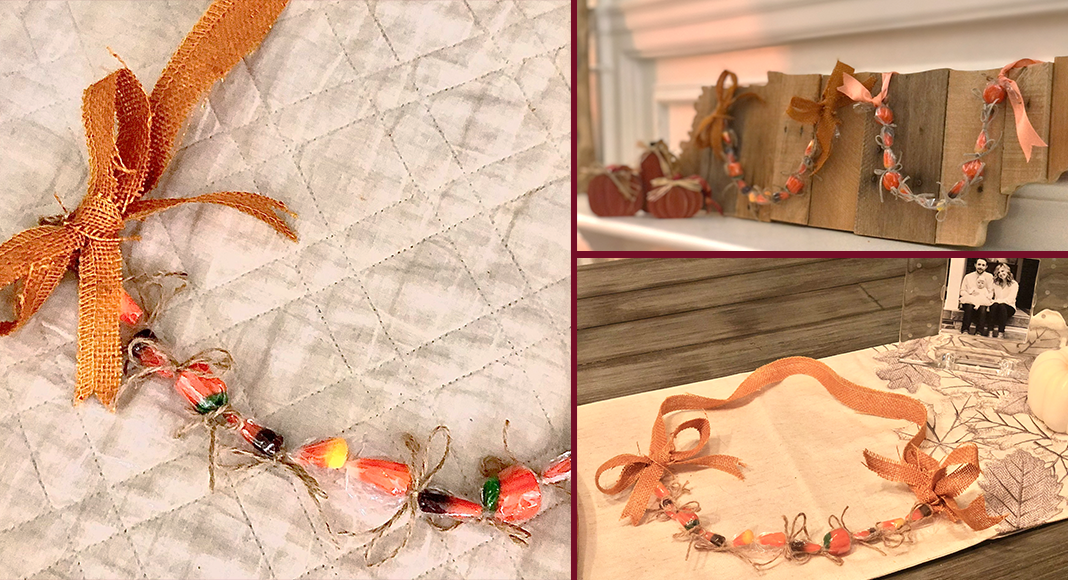
I loved how these turned out! I used a fun coral shade ribbon for one necklace, and a burlap ribbon and bow for the other to see how easy it is to change up the look from one to the next.
Bonus: These make for super cute Halloween garland when you secure multiple strands together to drape across your mantle!
On a personal note, my sweet sister-in-law is a virtual Knox County fourth grade teacher, and I can’t wait for my daughter to surprise her hard-working Auntie with one of these fall, edible, candy corn necklaces we made her with love.
Will you show our local teachers some love this autumn? Everyone could use a little more “corny” in their lives. Share your completed project in the comments below!
Be sure to also check out these ideas for Halloween fun at home!


 Halloween DIY necklaces are sure to put a smile on anyone's face! Spoil a teacher or a friend.)