


There’s a complete joy that comes with Easter, especially when you have young kids. And where I find joy, I always find the need for photos. It’s truly somehow engrained in my DNA. I could give you a million reasons why Easter is the perfect time for photos: the spring colors, those sweet little faces that you will always want to remember, and (if I’m being honest) those clothes that I spent WAY too much money on can only be justified if I capture the moment. And yes, I know that’s only 3 reasons and not quite a million but those right there are good enough for me!
So, let me introduce myself a little bit since I’m a new writer to these parts. I’m Katherine and I have been a photographer/business owner for the last 10 years but even before that I was learning all about film photography in college and working as a newspaper photographer. So photographing my kids on special occasions (or every day for that matter) really just comes with the territory of having a mom that LOVES photographs.
And while we aren’t going to all take extensive classes (who has time for that?) or go buy a fancy new camera there are some tips I can give you to make sure you get the best photos of your little cuties this Easter – even just with your cell phone.

Tips for Photographing Your Kids
1. Don’t Fight the Light
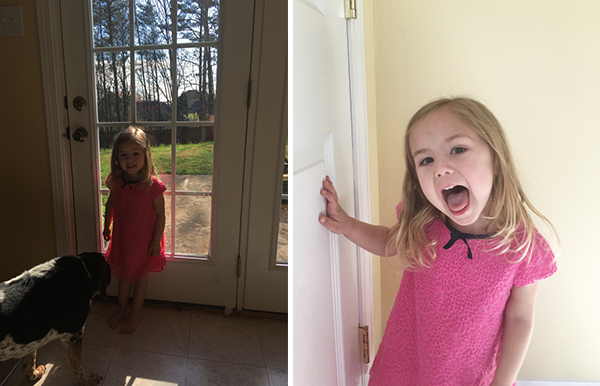
To me, the most important part of a photo of my kid is seeing their sweet little faces. So, if you are inside one of the biggest mistakes we can make is positioning our kids in front of a door or a large window and pointing the phone or camera into the light that is coming in. This makes our kids the darkest part of the photo and we don’t want that. So I encourage you to stand in front of the door or window (with your back to it) and let your kids stand with their faces to the light. Let that natural light beam down on them and you’ll notice you can even see the colors of their eyes. Here’s an illustration for you – both photos taken on my cell phone.
2. Adjust Your Phone to Adjust the Light
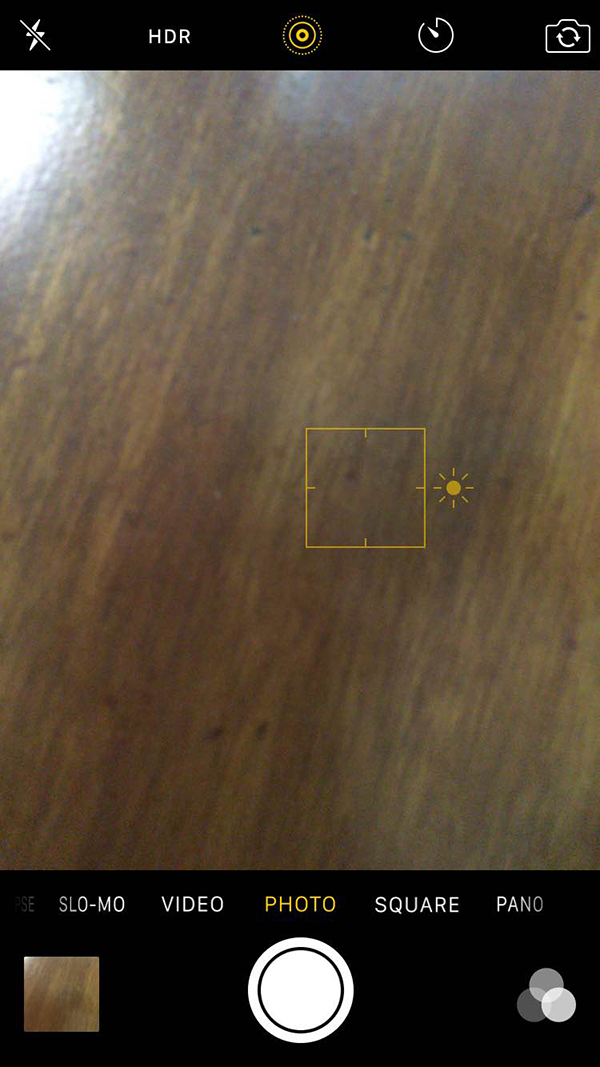
If you find yourself in a position where you are inside and you absolutely HAVE to have your kids in front of a door or a window, there’s a neat little trick you can do with your phone to make sure the camera is adjusted to expose their faces instead of the light coming in. When you click on the camera for your iPhone, if you tap your finger anywhere on the screen you will see a yellow box appear. If you don’t have an iPhone look for something similar on yours too (I’m sure most phones have this capability). Make sure you position the yellow box on your kids’ faces and the photo will be exposed to your kids, allowing the background to be brighter too but your kids won’t be in the dark. You can also tap on the sunshine that comes up on the right and slide it up or down to make it brighter or darker.
3. Shade vs. Sunlight
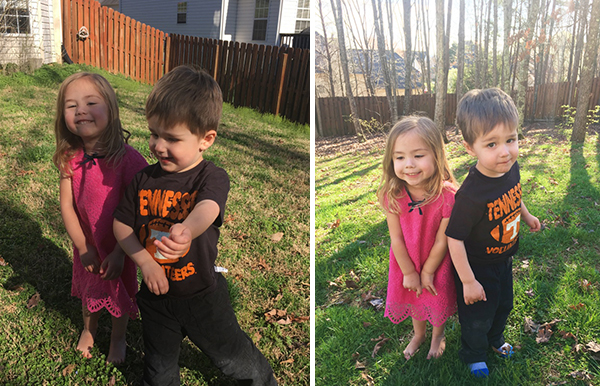
Now that you know how to adjust your phone to expose to those faces, you won’t believe how much better your photos will be in the shade. If you are photographing your kids in the middle of the day especially, a shaded area will work wonders! I know it is tempting when you see some beautiful flowers to want to put your kids in front of the flowers, but I think you’ll regret it. Take a moment to look up into the sky and see where the sun is. To me, it’s just not a photo-worthy spot if my children are squinting into the sun or (and this one really does drive me nuts), if one is in the shade and one is in the sun. The middle of the day sunlight causes a lot of shadows and kids will cast shadows on each other. Light is THE most important aspect of a photo!
I will say this though, if you are photographing your kids within the first hour of daylight or the last hour of daylight you might want to try them in the sun. That soft sunlight is called magic hour for a reason!
4. Working Those Smiles
Being the child of a photographer can’t always be easy. I have twins that are now three years old but when they were around 18 months I would get my camera out and all they would do was say, “no.” As they got a little older I realized I could bribe them and that worked great for a while – until they started just giving me the fakest smiles ever! So I’ve learned that in order to get the beautiful smiles that my kids have, there always has to be some kind of element of surprise. I can’t just tell them to smile, they won’t! This is something I usually think about ahead of time but sometimes I’ll burst into a song that I know my daughter loves. For my little boy, all I have to do is make up a song about poop and I’m good (he’s such a boy)! Whatever it is, you have to really make them laugh to get a genuine smile.
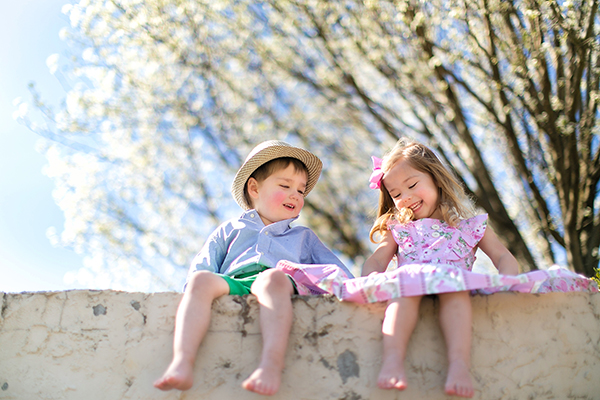
At weddings, what works for me for kids three and under is telling them not to smile. It works almost every time and since I don’t usually know the kid or the family, I can’t use my poop trick very easily, so this is my go to. The other is to mention wedding cake. Most of the time, kids don’t know that is coming at the end of the night. Again, elements of surprise are my best tricks! Here’s a photo I took, not with my phone, where my daughter’s dress kept flying up. I laughed first and we made it into a silly game.
5. Editing
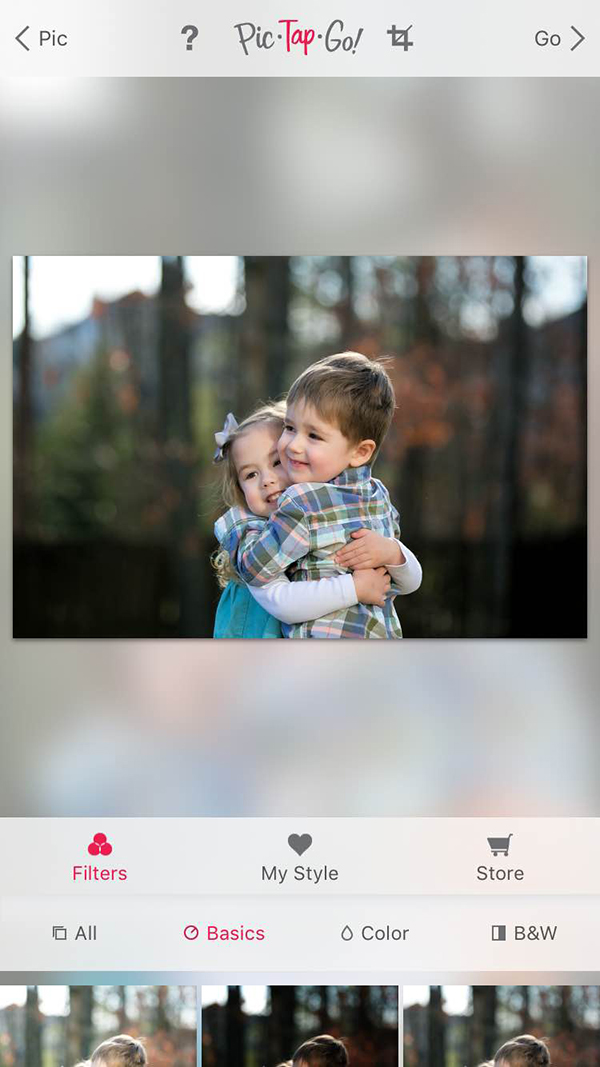
Lastly, my absolute favorite app is PicTapGo. It’s only $1.99 (I think) and it has the VERY best editing tools to add some finishing touches to your photo. My favorite things to use are Lights On, Auto Color, Equalize, and Crispity. And if you love black and white the way that I do, this is the best place to turn your photos into a timeless memory.


