


 My kids, like many of yours, love to do art projects at home and at school. But as their artistic efforts started piling up, I found myself at a loss in finding good ways to display their treasures. Prices on Etsy go up to $50 for a kids’ art display board and that’s before you tack on shipping, which is way more than I wanted to spend! I turned to Pinterest for a DIY version only to be nearly overwhelmed by all the options. However, I did manage to come up with plans for an art board that fit my budget and my skill level. This is the part where I should mention that I don’t have a lot of DIY skill or time or energy! Does that sound familiar?
That’s why I’ve put together a short list of materials and super easy steps so you can make a kids’ art display board too! It’s a project with which even your kids could help.
Clothespins: I really wanted red clothespins to coordinate with our playroom. I took one look at the tutorials online to paint clothespins and gave it a big thumb’s down. You have to take them apart and put them back together. Boo! Enter my old friend Amazon. I found large red clothespins in a 30-pack for $10.30 with Prime shipping. Click buy now! Since I did my project, Amazon has more colored clothespin options, smaller quantities and cheaper prices. Happy shopping to you!

Board: Baseboard to be exact. You won’t need much and it doesn’t cost very much. I opted for baseboard that’s already primed and had a nice flat surface to attach my clothespins. I loaded up my kids in the Home Depot car cart and we raced to the building supplies section. I selected this particular baseboard using my clothespin as my “ruler” to measure the width of the board. I already had a specific spot for the art board and knew the length of baseboard I needed. The Home Depot worker cut it to my exact measurements — win! The whopping total at checkout was $8.17 plus tax!
Paint: We had leftover trim paint in our garage, which didn’t add to my cost. I only needed one coat since the baseboard was already primed. You won’t need much paint to get the job done. A sample can of paint will likely be plenty to cover your piece of baseboard. Sample cans typically cost fewer than $5.
Glue Gun: I already have a glue gun and glue. It was just a matter of using a ruler and pencil to mark my clothespin placement on my 50-inch long piece of baseboard. Then I went to town!
Hanging Materials: This is when I asked my husband for an assist. He always gets nervous when he sees me walking around with his drill, so it wasn’t hard to get his help. Ha! He drilled two screws through the board and into the wall. The screws are only visible when there is no artwork, which is never! For those DIY experts with a router, you can hang the board without the screws being visible.
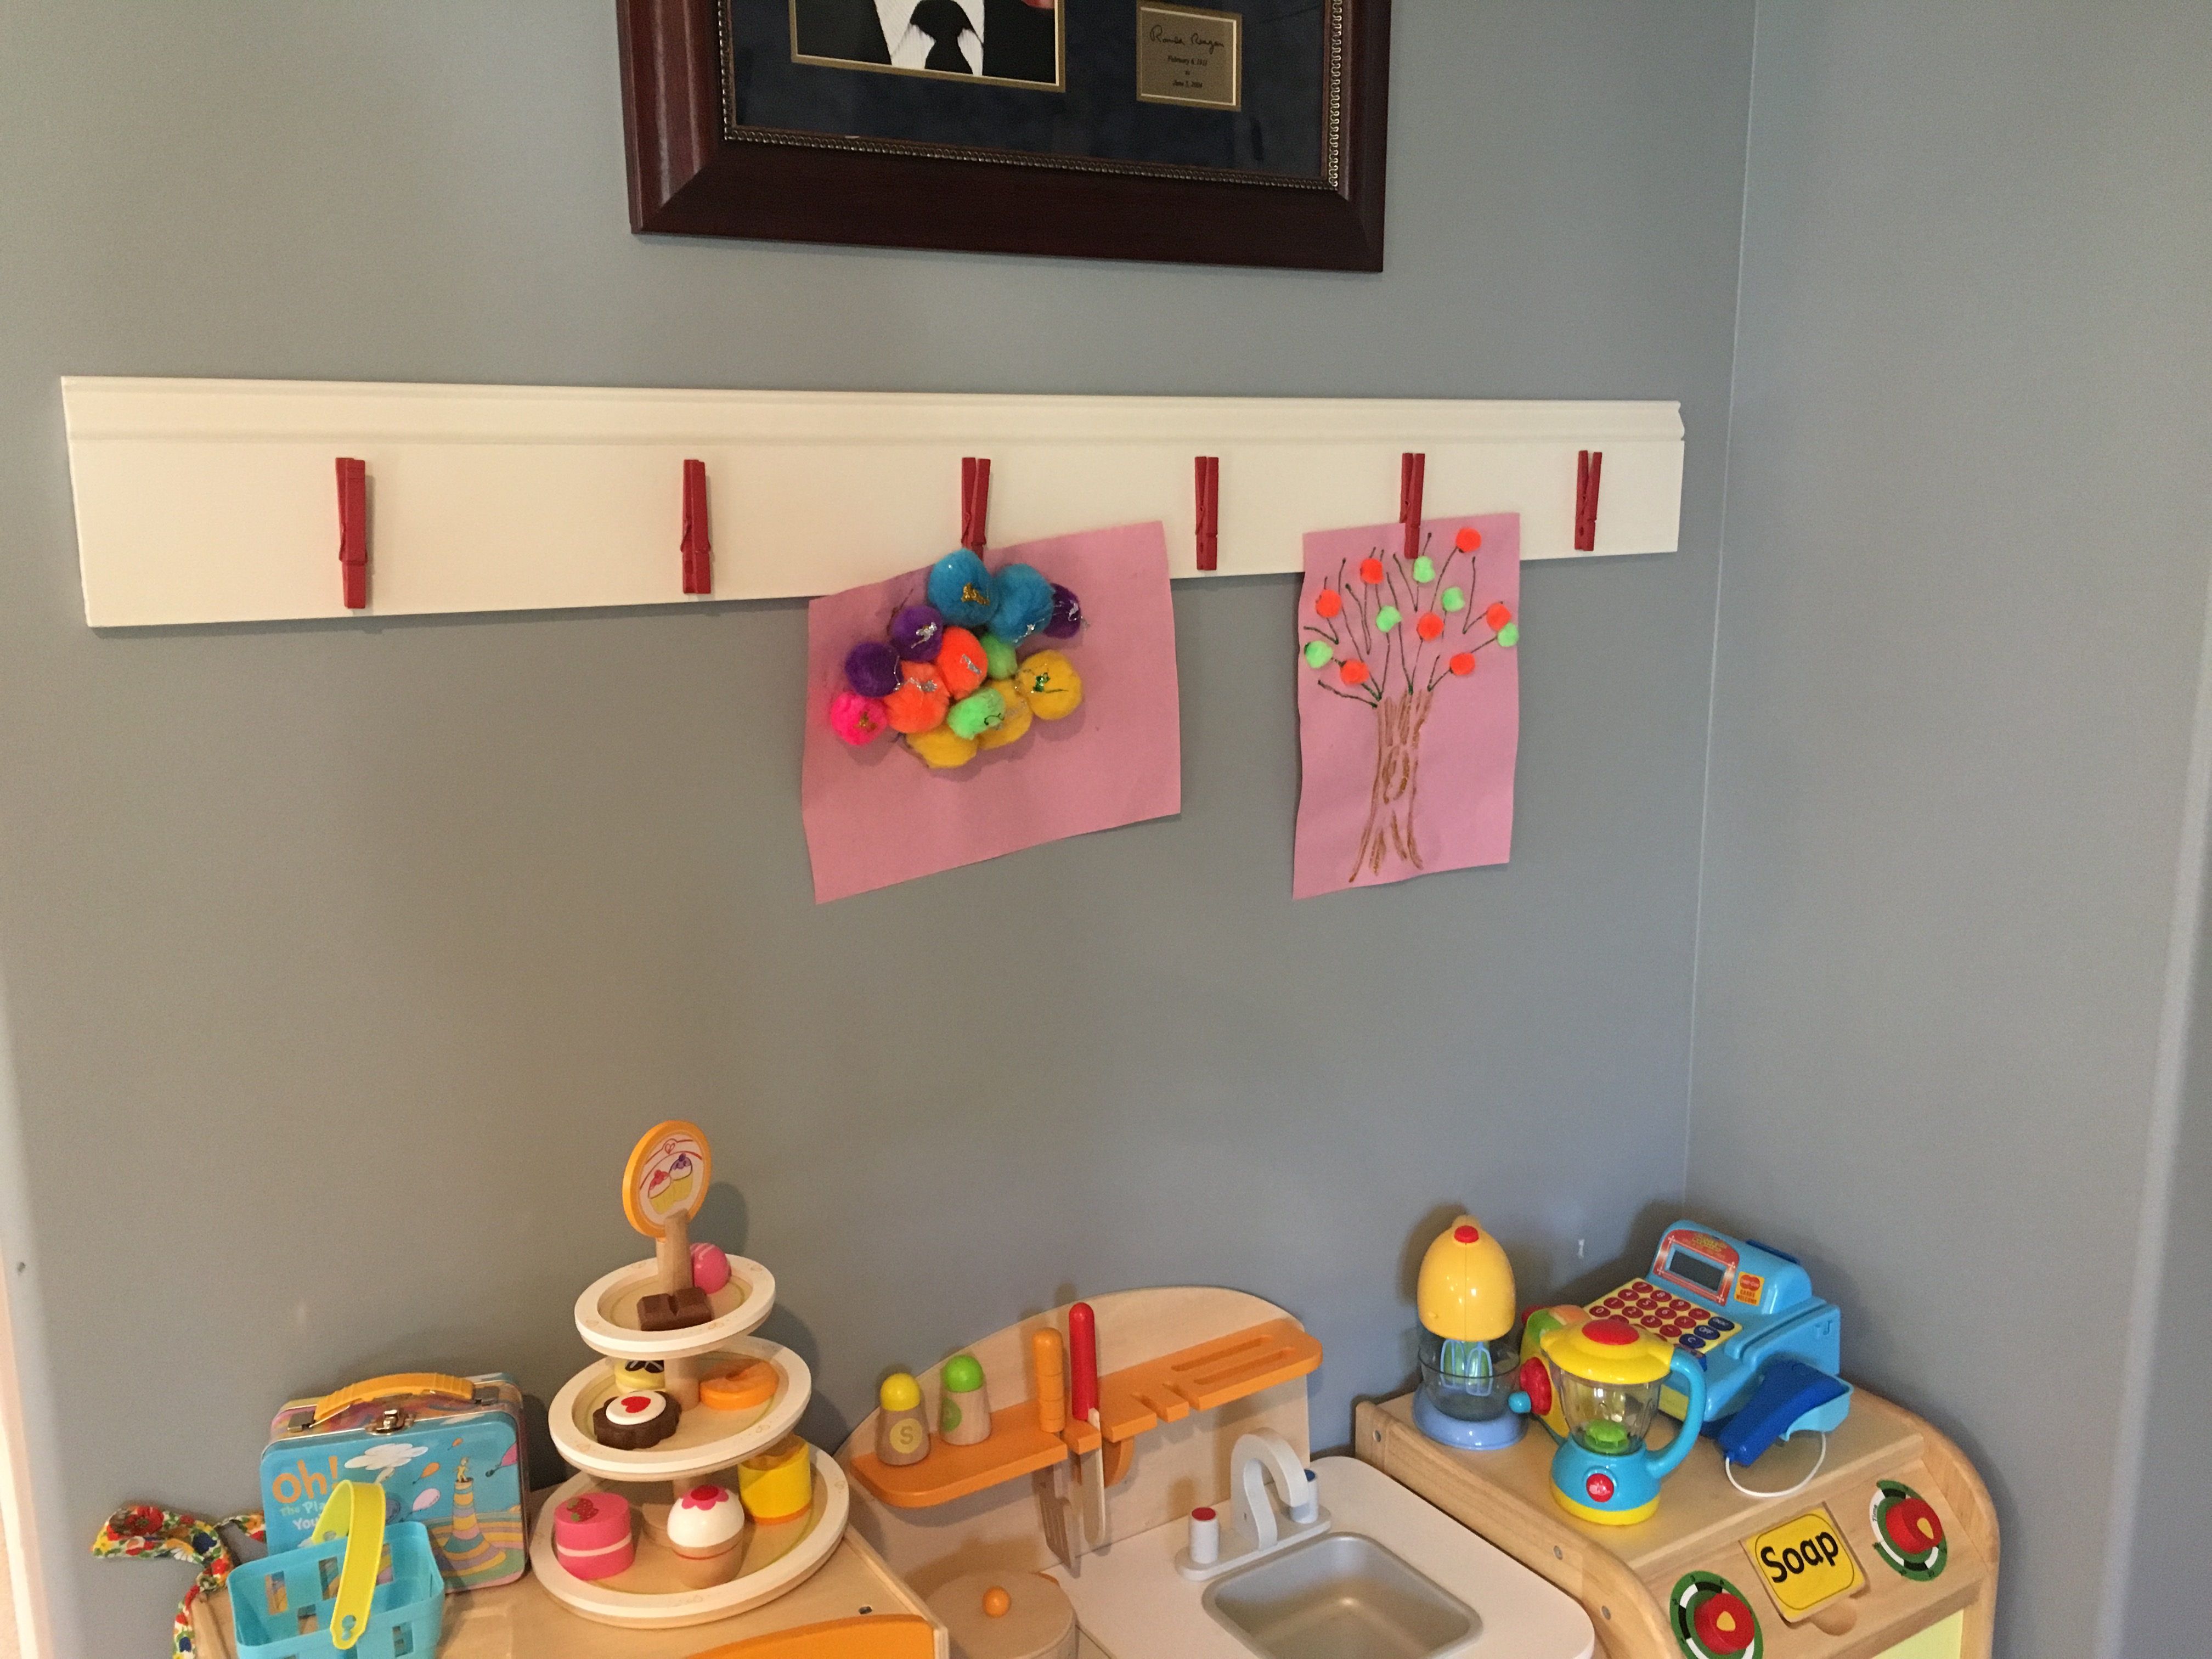
This project actually took two naptimes to complete because I needed to let my paint dry. But it was so worth it! My children get so excited when they complete an art project and they get to hang it on our art display board. Now I’m ready for my next project!


