


 Welcome to part 2 of my Create, Imagine, Play post! A few months ago, I shared the benefits of sensory bins and how you can create your own sensory bins in my post Create, Imagine, Play: Sensory Bins 101. This post is dedicated to outlining how you can create your own playdough sensory kits.
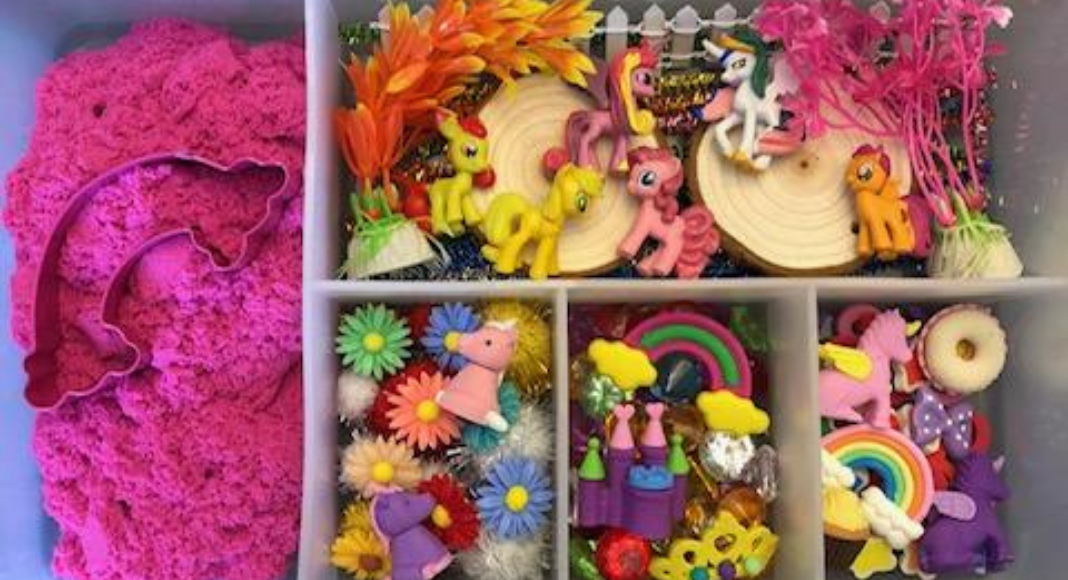
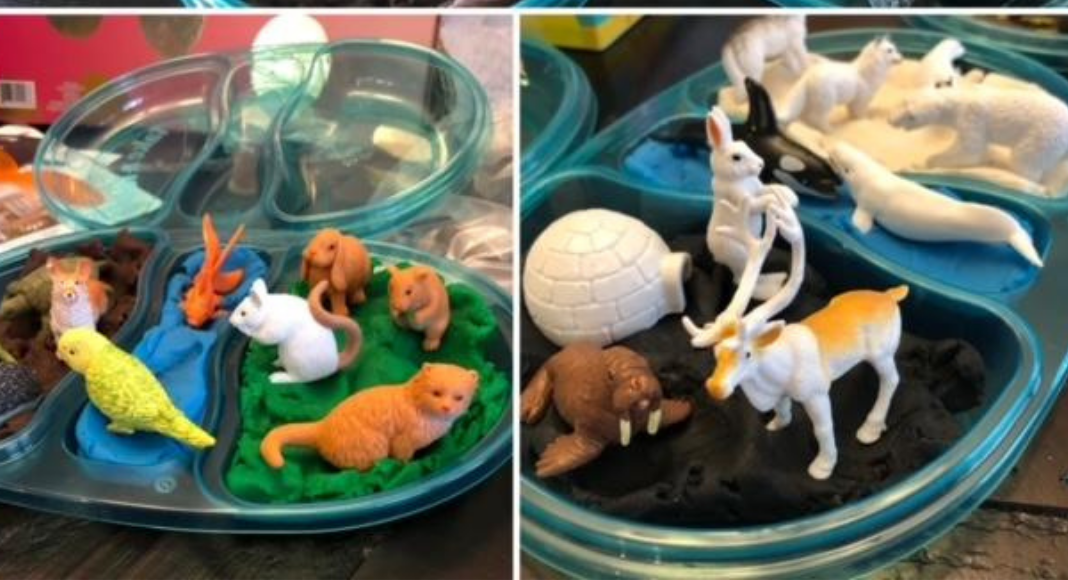
Playdough kits can keep your child occupied for a decent amount of time, allowing you the opportunity to sit and have your cup of coffee or make dinner. Playdough kits have the same benefits as and a similar concept to the sensory bins, but are slightly different. Most playdough kits that you have seen have a theme, playdough, figures and small decorative pieces that coordinate together; these kits are usually packed into a kit or can be used in a tray.

Initially, I made a super simple kit to bring along to restaurants so my toddler would stop asking for my phone and instead be occupied with something fun while we waited for our food. It was literally a Take and Toss plate container filled with playdough and small animal figurines. And it worked! Over time, I started to expand with more items and creating my own larger kits.
Here’s how I make my own sensory kits:
Container:
First, you will need to figure out where you want to house your kit. It can be as small and simple as a Take and Toss container or you can go a little bit larger and use a medium sized plastic storage container with a lid and dividers, such as a craft storage organizer or supply case. The dividers help keep everything organized. It’s up to you if you want to use them or just use a plain plastic container with a lid.
Theme:
I usually base each kit around a theme and start from there. These can be generic (dinosaurs, farm, insects, etc.) or can be specific (movie, TV show characters, a specific holiday, etc.). Although having a more specific theme could be more fun, it is also the most expensive and difficult route. Sometimes it is not easy to find specific pieces and at a good price.
Base:
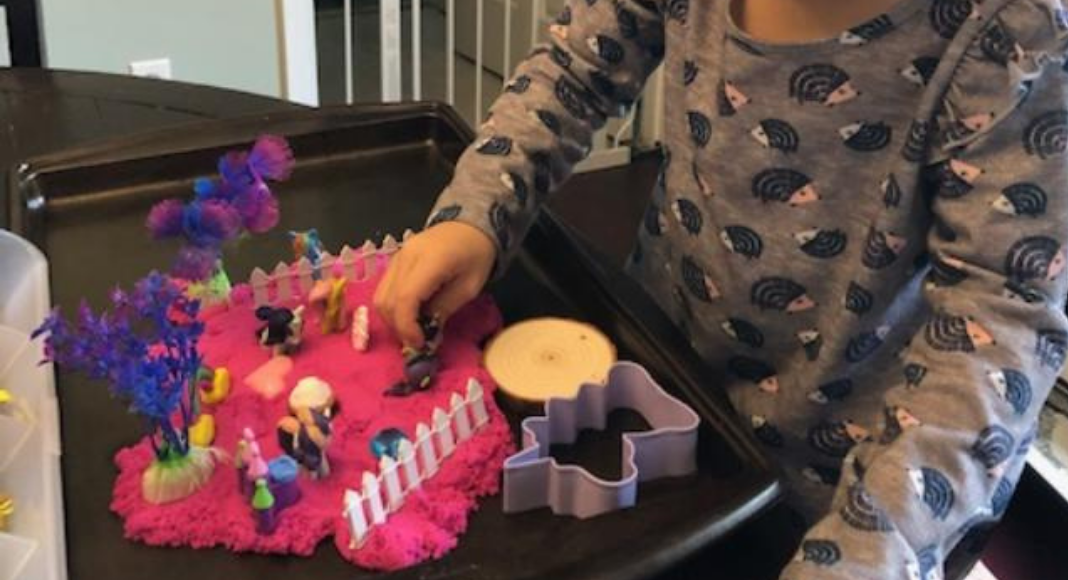
Most of the kits you will find have playdough as the main “base.” I love playdough and I love making my own, but the kits I create have kinetic sand. It’s a little more expensive than playdough, but the kinetic sand is so much more fun! You won’t get the same molding effect with cookie cutters with the sand, but it’s still another option and you can choose between the two depending on your theme. Kinetic sand also comes in a variety of colors just like playdough.
Figures:
I just love the little tiny figures! You can find these almost anywhere. Safari LTD has tons of different tubes of little figures that go really well with playdough kits. You can buy these at any craft store or online. I also like to go to the Dollar Tree or 5 Below and search for tiny characters. Sometimes the Dollar Tree will have little Disney and Nickelodeon figures for $1. Just make sure they are small enough to fit in your kit. You don’t always have to buy new figures however; check around the house and gather Happy Meal toys and get creative with what you already have!
Fillers:
Fillers are the small pieces that you add to help with the creating. These are the accessories that are folded into the dough or sand and used for decorations. Fillers can be anything; my favorite thing to use are the 3D erasers and slime charms. I also add small craft supplies like pipe cleaners, pom balls, jewels, rocks, or sometimes things I can find around the house. I love finding other uses for old toys and crafts supplies. Voilà, that’s how I make my kits! I do not recommend these kits for small children since they are filled with choking hazards. I would start kids under three with sensory bins and work up from there as they get older. Playdough kits take out the prep work in activity planning and it’s all in one box, which makes it easy for you to pull off the shelf, set on the table, and then get back to doing what you need to get done! These kits are also great to take on-the-go. Take them to the grandparent’s house or on vacation. I used to store a tiny kit in the car in case I had to take the kids to an appointment, run errands, or when we went out to eat. You can also make these as gifts or birthday party favors. Each child will use the kit in a different way that naturally fills their need for sensory output and creativity.


