 The sudden appearance of spring these past few days has done wonders to lift souls around our house and my Facebook feed tells me y’all feel the same. I love all the stained glass chalk paintings being shared, the gardening going on and the beginnings of water play. I wanted to bring a little of the spring beauty to our (very loose) learning schedule so I declared last week Butterfly Week and got to Pinteresting.
I found a tutorial for making butterfly rings using pipe cleaners and decided to combine it with one that also used pipe cleaners in a demonstration of how pollination works. Here’s what we did:
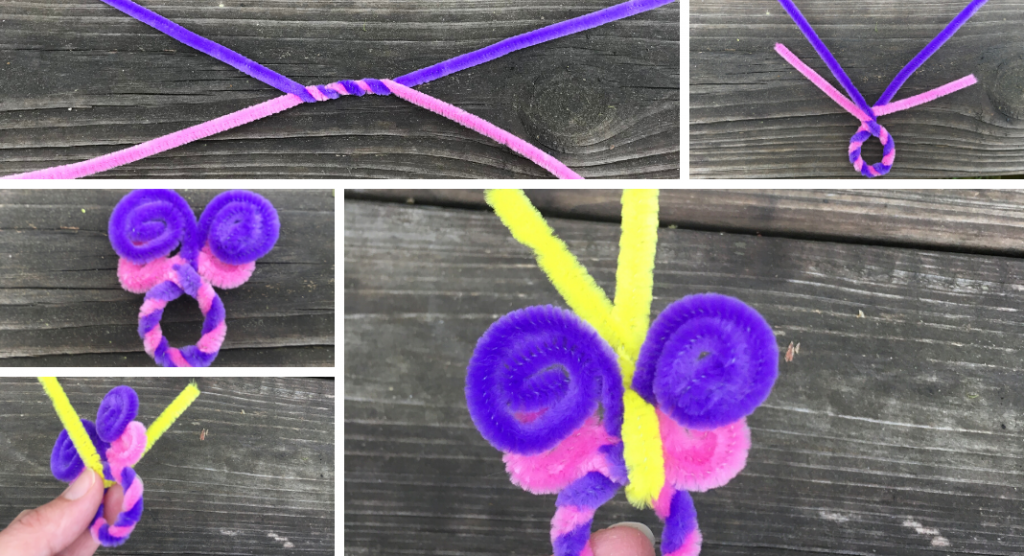 Choose two colors of pipe cleaners and, using the whole standard length stem, twist them around each other several times (pictured above, top left).
Wrap the twisted part around the finger you wish to wear the ring on and twist the ends around each other to form the ring, making sure it doesn’t tighten too much (top right).
Trim about three quarters of an inch from both ends of one color. This will make your lower wings slightly smaller than your upper wings.
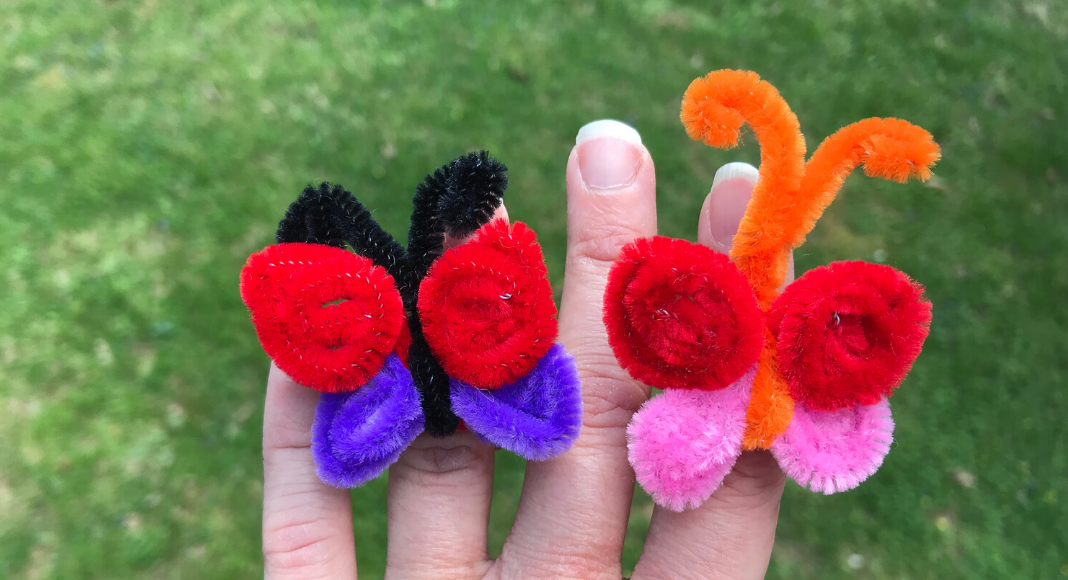
Roll both sides of the top stems downward in a spiral. Roll both sides of the bottom stems upward in a spiral. Arrange the bottom wings so they are tucked just under the top wings and shape as you wish, leaving them round or bringing the ends to a slight point (center left).
Take a third color of pipe cleaner and cut the stem in half. Using only one half, slip it through the ring portion and up between the sets of wings (bottom left).
Twist the top edges of the third stem around each other to secure, forming the body and two antennae. Trim or curl the antenna ends as desired (bottom right).
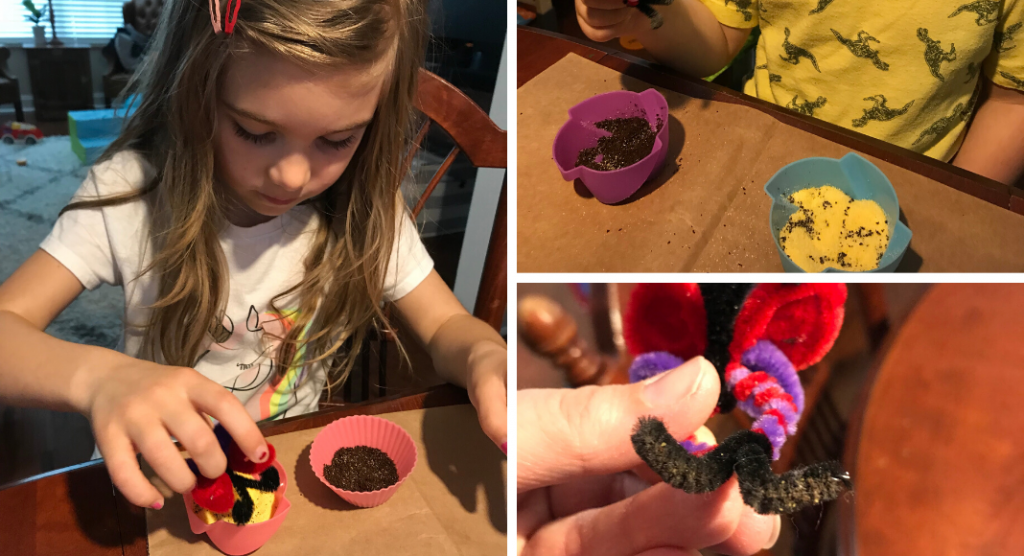 Once the rings were made, we slipped an additional pipe cleaner through the bottom of the ring and bent it out to look like feet (pictured above, bottom right). Black works best for the feet so that the “pollen” is clearly visible during the activity. We watched a short video I found on YouTube which described the parts of a flower and how pollinators help move pollen to create new flowers.
To set up our “flowers” I used some silicone muffin liners I had, but any shallow container with a wide mouth would work. Each kid needs one liner filled with coffee grounds and one containing cornmeal. They dip their pipe cleaners into each liner and can quickly see the materials get caught in the fuzzy hairs of their butterflies’ feet! By dipping their butterflies into the liners back and forth a few times, they can see the different colored materials begin to transfer and mix. It was helpful that the coffee and cornmeal were contrasting colors.
My first grader and four-year-old preschooler had so much fun with this! When we were done pollinating, we simply removed the dusty feet and left the butterfly as a fun ring to wear. Both of them were able to describe what they did and why. I also asked my first grader to write about the experiment using the science terms we’d talked about.


