Easter is right around the corner and it totally throws this mom off schedule! I think I prefer when Easter is in April – a little bit warmer for egg hunts, you know?
Like all other holidays, I try to find a fun recipe to make with my kids and we switch it up from different types of desserts and snacks. This year for Easter, I decided to do “Bunny Butt” cupcakes with Matthew and Cami – it’ll be exciting when Mason is old enough to join in the fun here in a couple years.
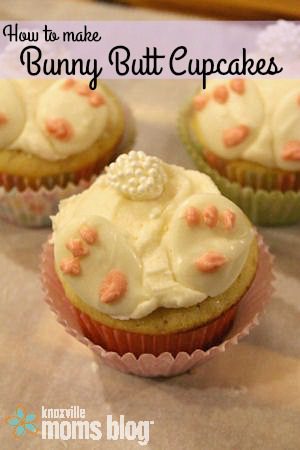
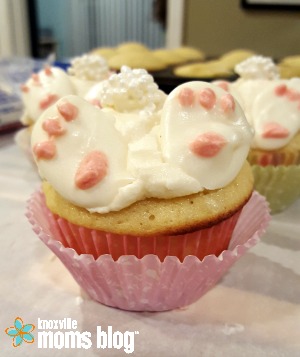
So what exactly are “Bunny Butt” cupcakes? Well, they are adorable little cupcakes that look like a bunny’s rear end. They have a cute little cottontail and little feet on the side. They are seriously just too cute!
My kids are still of the age where butts are funny, so they thought they were cute AND hilarious.
These cupcakes are super simple to make. You will need a trusty vanilla/white cupcake recipe –or– a box mix. I promise no one will judge you for buying cake mix. I tested out a new recipe (you can find it here) and we really loved the frosting that went with it. Mason refused the cupcake, but was impressed with the frosting, for sure. I think the cupcakes turned out a little more dense than I like, but Nick really loved them and the kids honestly don’t care. A cupcake is a cupcake to them! 🙂 You will need one recipe of frosting –or– premade frosting. I think the whipped vanilla frosting would work best because it’s so light and fluffy. For the decorations, you will need a package of white chocolate chips, pearl sprinkles, food coloring, and mini marshmallows.
So first you will want to prepare your cupcakes and let them cool. Prepare your frosting – which you could also tint with food coloring if you want to do different colors of bunnies – and frost your cooled cupcakes.
The next step was something Cami immediately became a pro at, although I think more marshmallows made it into her tummy than on the cupcakes. You dip a mini marshmallow into frosting and then dip it into little pearl sprinkles. It makes the cutest little cottontail ever! Place the cottontail on one side of each frosted cupcake.
The next part is a little labor intensive and probably the most difficult part of these cupcakes. You take white chocolate chips and melt them down in a double boiler. I used a spoon and placed a little melted chocolate on parchment paper and smoothed it out into an egg shape, but you could certainly “pipe” them onto your parchment paper in that egg shape. I made 24 “eggs” and let them sit out a little for the chocolate to harden up. You could also put them in the fridge to chill and set more quickly. I took my remaining melted chocolate and added a few drops of red food coloring to make it pink. I placed the melted chocolate into a plastic baggie, snipped a corner to make a teeny hole, and then “piped” three little dots on on side and a larger oval on the opposite side – to make the little pads like on the bottom of a bunny foot! I let them sit a little longer (again you could put them in the fridge to chill until they set) and then removed them from the parchment paper with a small offset spatula. Place two “feet” on the opposite side from the cottontail toes down (I did mine upside down – whoops!) and your cupcakes are finished!
They are wickedly cute and were so fun to make! There’s room for variation – you can add food coloring to your frosting, make the feet different colors to match your frosting, and even try different types of sprinkles for the tail!


